
Revive Blog
How to polish copper (the easy way)
In this post we’ll be showing you step-by-step how to polish copper the easy way. If you’re looking to transform your copper from a dull brown/blue into a stunning high shine, here you’ll find everything you need to know.
This method works on all non-ferrous metals, including copper, brass and aluminium. If you’re working with ferrous metals such as steel or lead, check out our other blogs.
Working safely with Copper
Before we begin the process of polishing copper, ensure you are aware of the following safety advice.
Firstly, metal poisoning: Copper is a toxic metal. And excess of Copper can build up in the body leading to ‘copperiedus‘. Normally this will only occur as a result of eating foods cooked in non-tinned copper pans, or long term exposure to copper via drinking water or work. Although it’s not something you normally need to worry about, it’s good motivation for aways wearing the appropriate safety gear. We advise the use of gloves, protective clothing, and goggles.
How to polish copper – Easy step-by-step guide
During this How to polish copper guide, we’ll be using the simple tools and compound supplied by Revive tool, but you can use similar tools and compounds.
How to Polish Copper – The Easy Way (quick guide)
Here’s our quick guide for How to Polish Metal the easy way. Please see underneath for a more detailed guide to polishing copper and other non-ferrous metals.
Time needed: 45 minutes.
How to Polish Copper – The Easy Way
This method uses the super-value Copper Polishing Kit from Revive Tool, which is mounted to any household drill, but you can use hand tools too.
- Clamp your compound bar to your workbench
This makes applying the compound to your polishing wheel much easier. Begin with the darker compound bar.

- Apply the compound to the course polishing wheel
Begin with the course polishing wheel. Simply apply the dark copper polishing compound to the course polishing disk by spinning the wheel against the compound.
- Work your compound across the whole surface
Move over the entire surface of your object with the spinning wheel. Keep adding compound to the wheel regularly. Do not concentrate in one spot for too long.
- Switch to the medium polishing mop & lighter compound
Repeat the same process but this time using the medium polishing mop and the lighter colour compound bar.

- Finally use the softest polishing mop
The final step is to repeat the same process, but with the softest polishing mop. This step buffs the surface into a high shine.
Equipment
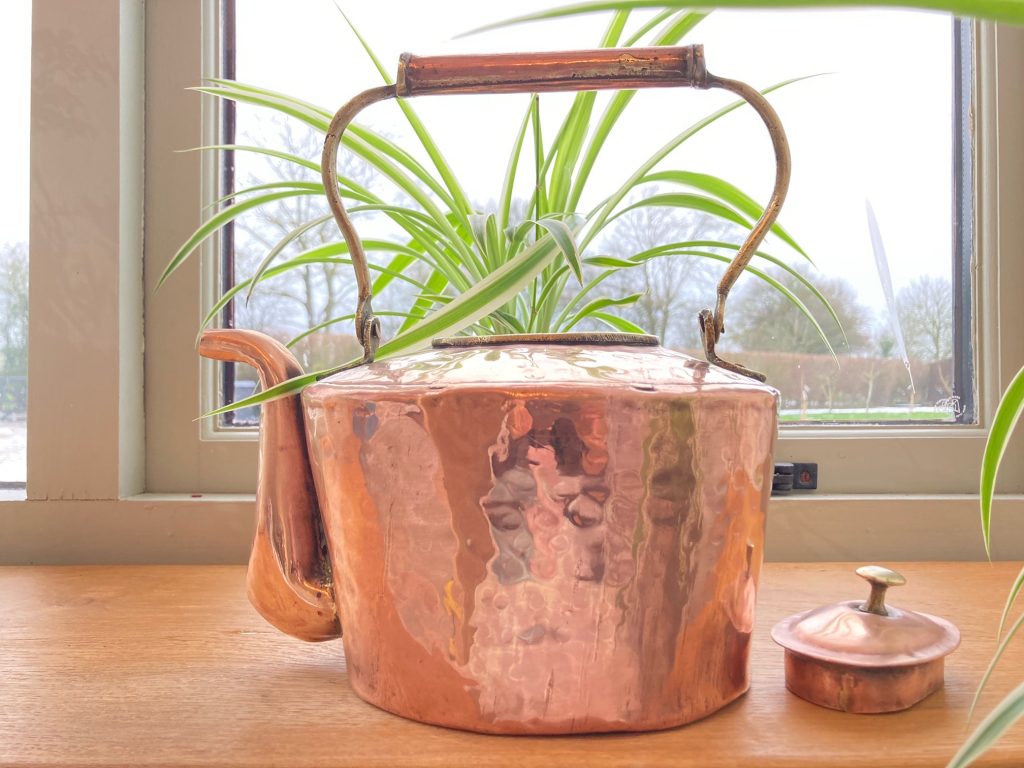
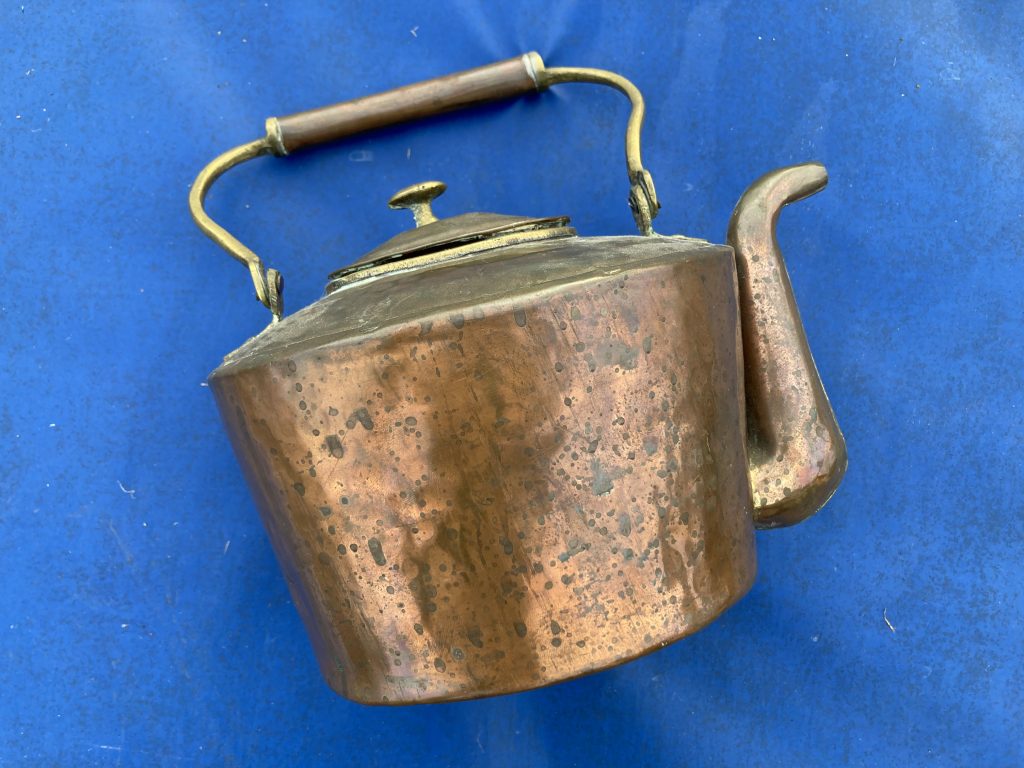
We’ll be using the £14.99 Copper Polishing Kit to demonstrate achieving the mirror finish on this old copper kettle. However, you can achieve the same result using tools and abrasives at home (see the kit lis you’ll need below).
Copper Polishing Kit – Drill-Mounted
£14.99
If you’re using a different kit, assembled at home, or from your local hardware shop, here’s what you’ll need:
- Reverse thread mandrel
- Dry sisal polishing mop (rough)
- Stitched polishing mop (medium)
- Polishing mop (light)
- Bar of Blue compound (for polishing non-ferrous metal such as aluminium, brass and copper)
- Bar of Brown compound (for cutting non-ferrous metal such as aluminium, brass and copper)
You will also need a standard electric drill.
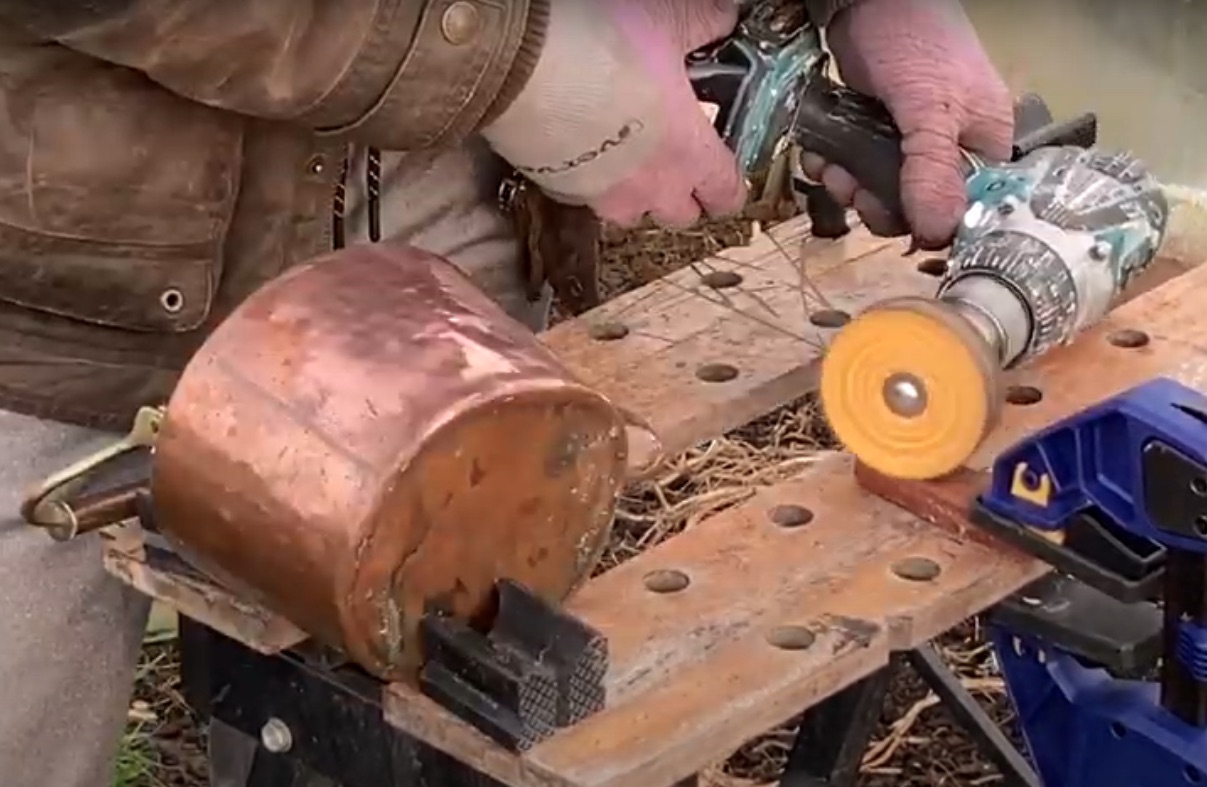
Method – How to Polish Copper, Step 1
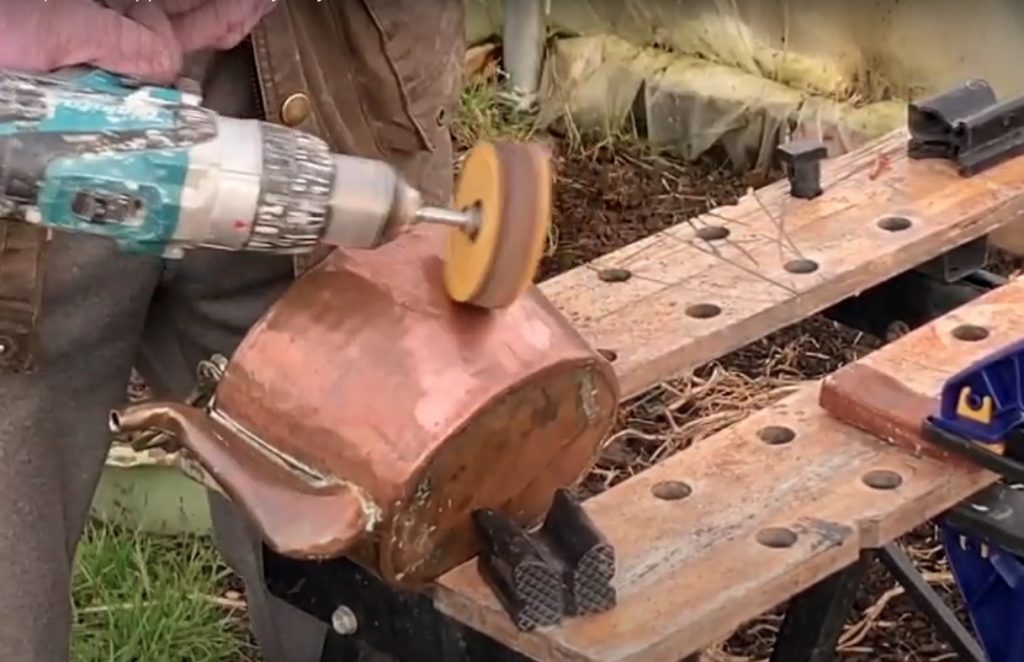
The process of polishing copper to a mirror finish involves applying an abrasive compound (use the brown cutting compound) onto your copper surface using the most abrasive wheel in the set (which will be mounted on a handheld electric drill via the mandrel to seriously speed up the process).
This first step will remove the grime, oxidation and dirt from your surface, exposing a new layer of copper underneath.
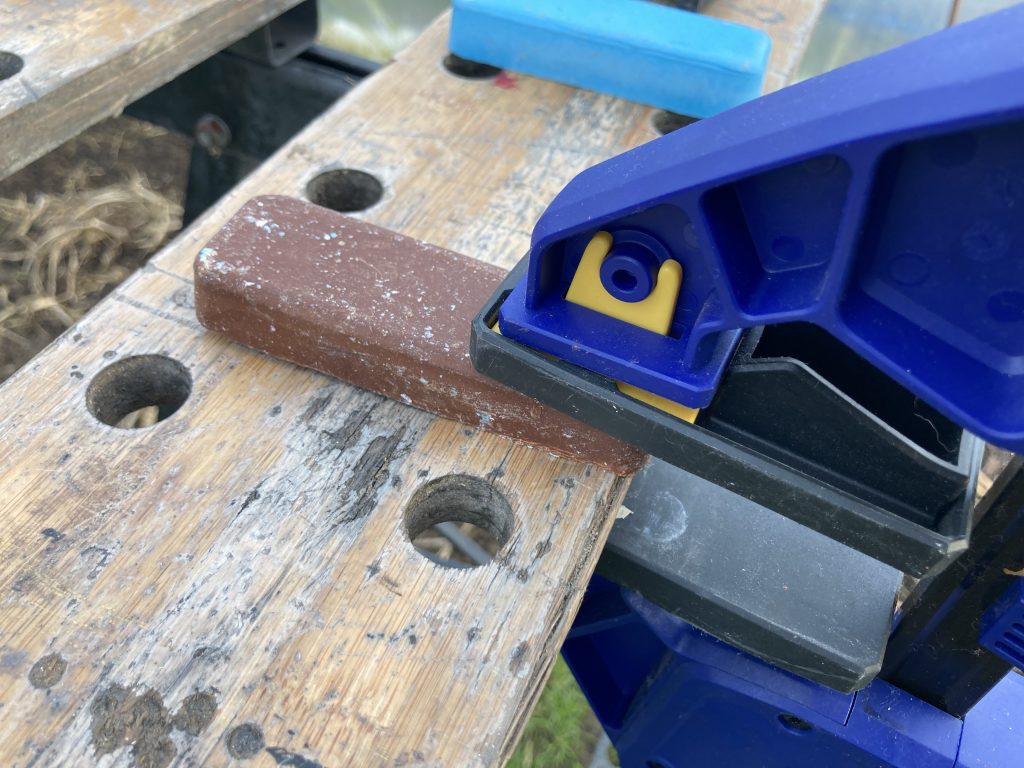
Apply the brown cutting compound to the wheel by clamping the brown compound to a work-surface, then spin the wheel into the compound to coat the wheel in a thin layer of the compound.

Then work the copper surface with the compound coated wheel. Go in figure of eight movements and try not to dwell on one spot for too long (you don’t want your surface to become uneven where you’ve worn down some spots more than others.
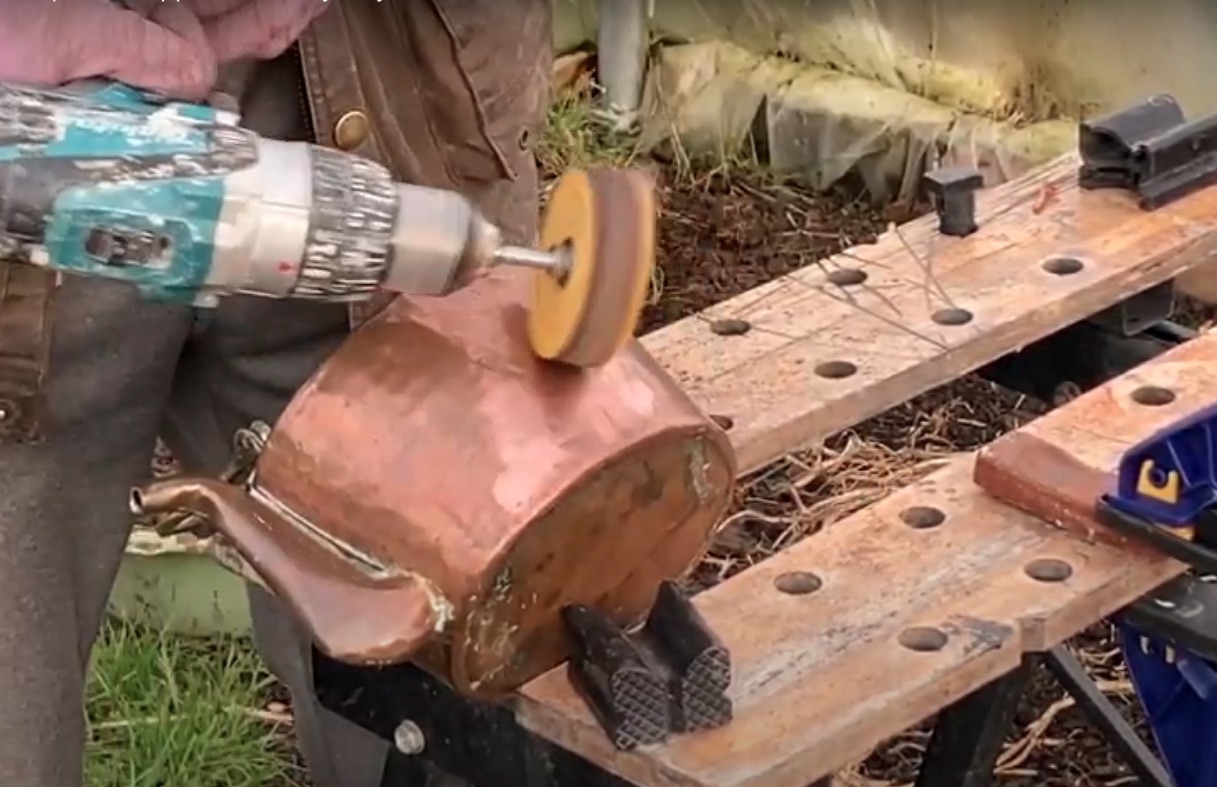
Method – How to Polish Copper, Step 2
Once you’ve applied an appropriate amount of abrasive compound to your copper surface, the trick is to move down to the next level of abrasiveness. So, change the course polishing wheel for the ‘medium’ polishing wheel and repeat the same steps.
Again, work the copper surface with the compound coated wheel. Go in figure of eight movements and try not to dwell on one spot for too long (as before, you don’t want your surface to become uneven where you’ve worn down or buffed up some spots more than others.
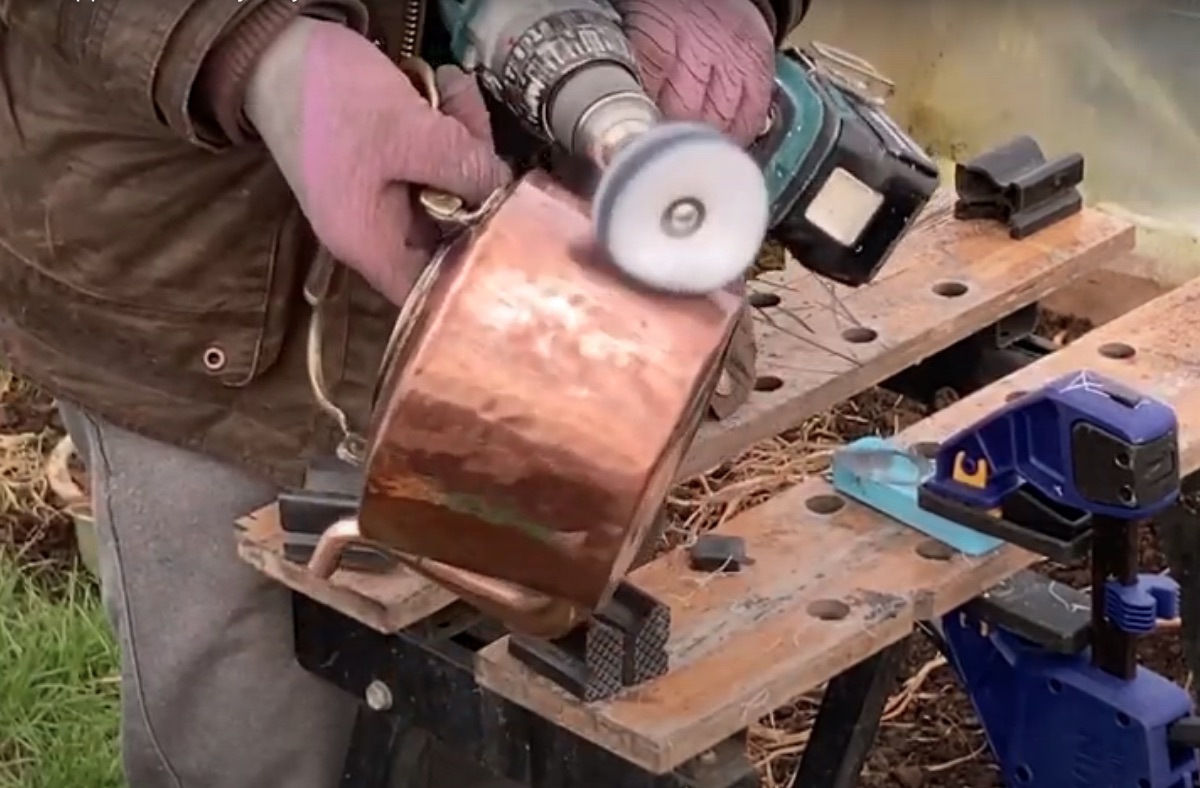
Method – How to Polish Copper, Step 3
Once you’ve taken all of the dirt and grime from your surface, you should be able to see a nice copper colour coming through. But you’ll notice that it doesn’t have a mirror finish, yet.
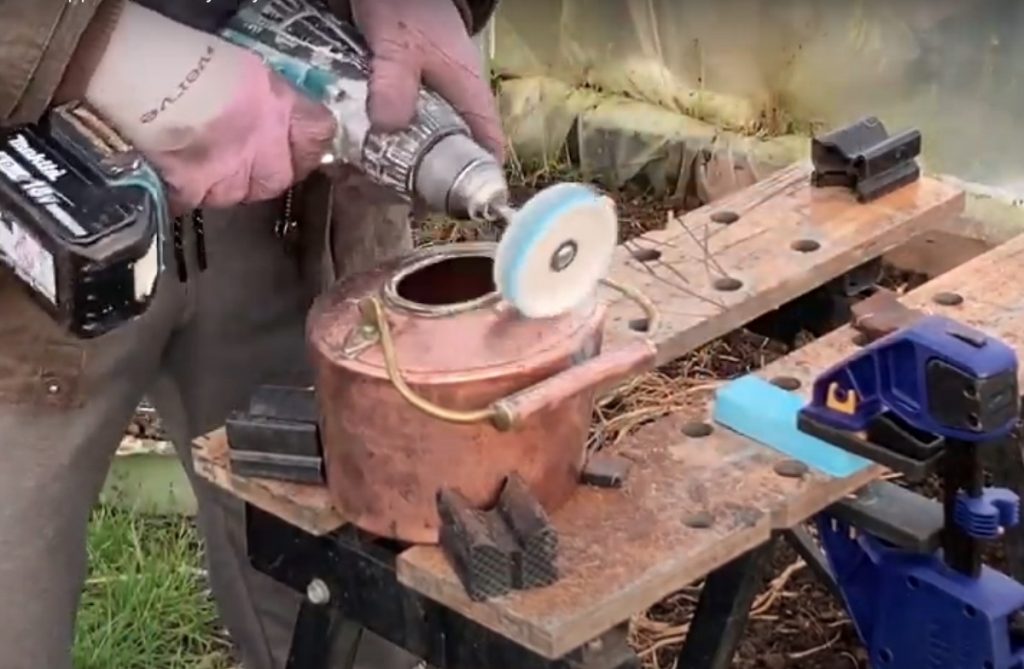
This is where you need to change your wheel to the softest polishing wheel.

You’ll be repeating the same method once again, but this time you’ll need to use the blue polishing compound.
Again, work the copper surface, this time with the blue compound coated wheel. Go in figure of eight movements and try not to dwell on one spot for too long (you don’t want some spots to be shinier than others). Continue until you see a lovely even shine and a spectacular mirror finish.
Perfecting the copper polishing method
If you get to the end of step three still see a few scratches, you can simply repeat the process again.
It sounds time consuming, but if you have the correct wheels and compound, it’s a fairly fast and hassle free way of polishing copper. It took us 45 minutes to achieve this incredible finish on the copper kettle.
What can you use this copper polishing method for?
You can use this method to shine up any copper surface:
- Fire companions, trophies and medals
- Exposed copper and brass pipes and fittings
- Antique copper pans
- Copper bars or sheets
- Copper baths
You can also use this EXACT method for polishing other non-ferrous metals such as aluminium or brass. Simply follow the how to polish copper guide above and apply it to any other non-ferrous metal for a stunning result.
If you’re polishing ferrous metals such as steel and iron, ReviveTool.com has kits for those too.
Please note that we’re committed to saving objects from landfill by helping you to up-cycle and repurpose them. Read our blog about 10 small ways that we can live more sustainably.